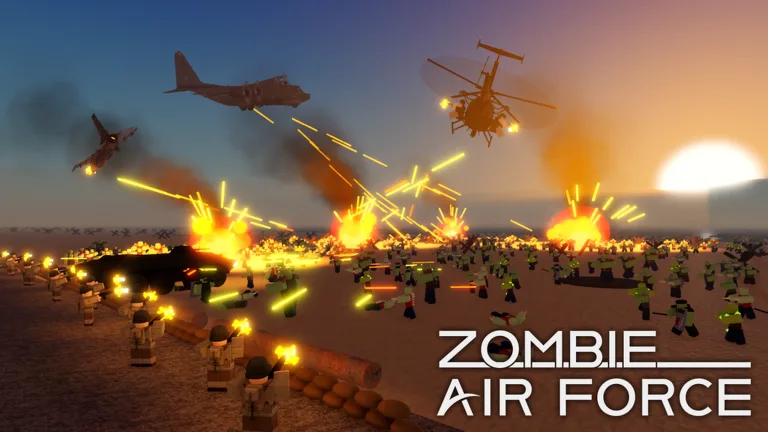
Discover expert strategies for the Zombie Air Force beach map. Learn wave survival, boss fights, and how to dominate this Roblox challenge.
Published: Zombie Air Force Wiki Editorial Team
Table of Contents
Surviving the Ultimate Coastal Threat
The skies above the shoreline are packed with relentless terror, making the zombie air force beach map one of the most intense operational zones in Roblox survival gaming. When you drop into this combat scenario, your squad is immediately tasked with holding a defensive line against relentless waves of airborne and ground threats without a single moment to rest. Understanding how to master the zombie air force beach map requires fast reflexes, strict resource management, and a deep understanding of upgrade paths available at the end of each wave.
According to recent player experience reports, success on this coastal battlefield hinges on balancing anti-air turret deployment with heavy artillery fire. Developer fresh green beans designed this environment to test even the most coordinated squads, blending high-speed aerial threats with terrifying boss encounters. Whether you are playing solo or coordinating with a full lobby of pilots, knowing what to expect from every single phase of the assault will keep your team from dropping like flies.
Understanding Wave Mechanics and Combat Phases
Combat on the shoreline unfolds in distinct, punishing stages that demand constant tactical adaptation. During quiet moments between waves, players must scramble to rearm, repair damaged positions, and vote on the next deployment phase.
Defend the Line: Hold your firing positions against standard infantry waves using rifles and deployed rally flares.
Manage Aerial Threats: Switch targets immediately when winged contacts appear high and fast to prevent base overruns.
Engage Heavy Units: Focus concentrated heat and firepower on ground giants, such as incoming Apache-class threats.
Rearm and Repair: Utilize the brief lulls between major assaults to patch up defenses and spend accumulated Credits on the upgrade tree.
To help you visualize the escalation of threat levels across different phases, the following breakdown outlines the primary combat tiers encountered on the shoreline:
Combat Phase
Threat Type
Primary Weaponry Counter
Tactical Objective
Phase 1
Ground infantry & light undead
Standard rifles, shock waves
Hold the primary defensive perimeter
Phase 2
Winged high-speed contacts
Anti-air turrets, chain guns
Clear airspace before ground reinforcement
Phase 3
Ground giants & heavy armor
Heavy artillery, concentrated heat
Target armor weak points and stagger advance
Phase 4
The Plague Mount boss
Specialized turrets, lock flares
Disable outer turrets, then expose the core
Defeating the Plague Mount Boss
The ultimate test on this coastal theater is the massive boss encounter known as the plague mount. According to community reports from veteran pilots, simply firing at random will drain your ammunition without stopping the beast. An organized approach is mandatory to break through its defenses and secure victory for your squad.
Tip
When fighting the plague mount, prioritize destroying its side turrets first. Once the outer defenses are disabled, the creature's rib cage will open, exposing its vulnerable heart for a limited window of attack.
For a clearer overview of the boss engagement strategy, review the tactical target priority list below:
[ ] Identify and destroy the glowing lanterns that keep the undead forces rising.
[ ] Watch out for invisible stalkers indicated by visual shimmers in the surrounding environment.
[ ] Strip away the boss turret defenses before expending heavy rocket ammunition on its core.
[ ] Coordinate with fellow pilots to pool firepower once the heart chamber opens.
Maximizing Your Upgrades and Resource Management
Surviving wave after wave on the shoreline yields valuable Credits and Medals, which serve as the lifeblood of your long-term progression. With more than 180 distinct upgrades available on the progression tree—covering everything from rockets and chain guns to automated air strikes—spending your currency wisely is vital.
Credit Efficiency
Save your hard-earned Credits for critical defensive thresholds rather than minor cosmetic adjustments. Upgrading your heavy ordnance directly correlates to how deep into the later waves your squad can push.
Experience Boosts
Keep an eye out for active promo codes and group bonuses. Joining the official Roblox developer group grants a permanent 10% XP and Credit bonus, significantly accelerating your progression through the extensive upgrade tree.
The table below highlights how different resource categories impact your combat effectiveness during tough skirmishes:
Resource Type
Primary Source
Main Utility
Recommended Usage
Credits
Wave completion & codes
Purchasing combat upgrades
Spend on chain guns and rocket trees
Medals
Special milestones & codes
Unlocking elite tiers
Save for high-end tactical equipment
EXP Boosts
Promotional rewards
Accelerating rank progression
Activate before long endurance sessions
For official game updates, community coordination, and the latest news regarding gameplay changes, you can check out the official Roblox Game Page maintained by the developers.
Frequently Asked Questions
How do I access the beach map in Zombie Air Force?
The map selection typically appears during the voting phase between deployments. Cast your vote when prompted by the game interface to help your lobby deploy to the coastal region.
What are the best weapons to use against the plague mount boss?
Heavy rocket launchers and upgraded chain guns yield the best results. Focus heavily on turrets first, then unload all accumulated heat and explosive damage into its exposed heart.
Are there promo codes that give extra Credits for upgrades?
Yes, active promotional codes regularly provide thousands of Credits and temporary percentage boosts, allowing you to purchase essential upgrades from the extensive skill tree much faster.
Can I play the zombie air force beach map in solo mode?
While cooperative multiplayer makes handling massive waves and giant bosses much easier, skilled solo pilots can also test their endurance by optimizing their loadout and managing defensive cooldowns carefully.